
Hi Friends!
This is my version of a raw hummus. It is a cashew-based hummus that is wonderful for dipping crackers, chips, and veggies in as a snack. For lunch or dinner, it mimics cheese and works great in between slices of tomato with fresh basil leaves like a caprese salad! Also try on raw crusts or flatbreads as a spread for little mediterrenean pizzas with spinach, kalamata olives, tomatoes, etc!
I like it better than a raw chickpea hummus, because I am not a huge fan of the taste of sprouted legumes in hummus (I prefer them in a sprout salad) and I think it mimics the texture/taste of hummus much better, while remaining raw so you don't have to sacrifice on enzymatic quality and therefore energy!
Cashews make a great base for wonderful raw vegan cheeses, cream sauces, and cashew whipped cream, easily replacing the need for dairy in one's diet. Yay cashews!
My version of Raw Cashew Hummus:
Throw all of this in a food processor or Vitamix:
2 cups organic raw cashews, soaked a couple hours to overnight (soaking nuts removes their naturally occurring enzyme inhibitors, making them easier to digest, thus giving you more energy)
1/4 cup fresh squeezed organic lemon juice (usually about one lemon)
1 small clove garlic
2 big spoons of raw sesame tahini (I use Artisana brand or make my own by putting sesame seeds in a food processor with a little oil or water)
1 tsp sea salt
1/2 cup or a little more or less water as needed to reach desired consistency (add this as you need it after blending other ingredients)
A little cayenne pepper if you like it!
Blend it up and add water a little at a time until it is the fluffy, smooth consistency of hummus. I always have to scrape down the sides of the food processor as I go.
I make this almost weekly to have in the fridge as a great raw snack, and quick, easy lunch/dinner idea.
Enjoy!
Love, Ab
Showing posts with label organic. Show all posts
Showing posts with label organic. Show all posts
Wednesday, October 26, 2011

Thursday, July 14, 2011
Our Organic Garden Beds
Ok, first, this doesn't have a whole lot to do with this post about our gardens, except that I happened to upload these two pics of a fabulous raw "hummus pizza" dinner we shared out in our "tree house." Preston and his culinary genius created this raw flat bread made of squash, flax, and herbs, and we dehydrated it (low temps as to preserve the enzymes needed for digestion) in our new Excalibur 9-tray dehydrator. We then topped it with a raw cashew hummus (I like the taste of raw hummus with a cashew base rather than soaked chickpeas--recipe to come soon!) and garden greens, tomatoes, avacadoes, and cilantro from the garden you are about to see!!! And a summer favorite: San Pellegrino with lemon and of course, cherries!! So refreshing!!


Now, on to the garden.
Preston and I have two raised beds in our little backyard, and this year, they are yeilding a lot of food, especially greens, and I wanted to share it with you!
The Birth of our Raised Beds
Last year Preston built them and we spent an afternoon literally lugging dirt in 5 gallon buckets from bins in the trunk of our little Corolla (no truck, no wheelbarrow lol) into the garden beds. The dirt was...eh...not the best. It didn't drain very well, and we didn't have any finished compost having just moved in that year, but we added lots of soil amendments and worked on it for a while, and when it drained ok, we crossed our fingers and planted our garden. Well, it was already June by that time, and we travelled three times that month and I'm sure it dried out at the pivitol times when it was sprouting, but amazingly, it yeilded some really good greens among other things, once again reminding us that nature is a miracle, and a lot of the time, it is this simple: You plant it, and it grows. There certainly are a lot of things to learn about gardening, and I've read so many books, but I still feel like I'm just beginning. I'm finding the best method is trial and error, as well as intuition, and working along with nature in a beautiful co-creation.
Gratefully, this year, our garden has done wonderfully well. In the fall, we left the roots in the soil and chopped up everything else on top, and we sprinkled what unfinished compost we had on the beds along with some dead leaves. We left it to decompose, and a lot of it did, and I'm happy to report that there were worms and other creepy crawlers in the soil when we prepared the garden bed this spring.
This spring, much earlier than last year we began to prepare our garden beds by removing the leftover leaves that had not yet decomposed, and we put them in our compost buckets.
We then added a soil amendment that had kelp meal and compost from cotton burrs, and some Yum Yum mix, and very gently incorporated it (as not to disturb the mircoorganisms too much.)
Then we planted, and waited...
And one day...
Last year Preston built them and we spent an afternoon literally lugging dirt in 5 gallon buckets from bins in the trunk of our little Corolla (no truck, no wheelbarrow lol) into the garden beds. The dirt was...eh...not the best. It didn't drain very well, and we didn't have any finished compost having just moved in that year, but we added lots of soil amendments and worked on it for a while, and when it drained ok, we crossed our fingers and planted our garden. Well, it was already June by that time, and we travelled three times that month and I'm sure it dried out at the pivitol times when it was sprouting, but amazingly, it yeilded some really good greens among other things, once again reminding us that nature is a miracle, and a lot of the time, it is this simple: You plant it, and it grows. There certainly are a lot of things to learn about gardening, and I've read so many books, but I still feel like I'm just beginning. I'm finding the best method is trial and error, as well as intuition, and working along with nature in a beautiful co-creation.
Gratefully, this year, our garden has done wonderfully well. In the fall, we left the roots in the soil and chopped up everything else on top, and we sprinkled what unfinished compost we had on the beds along with some dead leaves. We left it to decompose, and a lot of it did, and I'm happy to report that there were worms and other creepy crawlers in the soil when we prepared the garden bed this spring.
This spring, much earlier than last year we began to prepare our garden beds by removing the leftover leaves that had not yet decomposed, and we put them in our compost buckets.
We then added a soil amendment that had kelp meal and compost from cotton burrs, and some Yum Yum mix, and very gently incorporated it (as not to disturb the mircoorganisms too much.)
Then we planted, and waited...
And one day...

Tiny baby curly and dino kale sprouts!
Sunflower sprouts began to grow in our compost buckets! It was cute. We had thrown out some sprouted sunflower seeds that had gone bad and still, they wanted to be flowers! :)

Baby cilantro sprouts reaching to the sun...

Baby greens mix almost ready for harvest! (and we did, and it was fab.)

Baby spinach :)

Baby rainbow and swiss chard...

I re-mulched by the fence in the front yard, and put up this cute little sign...

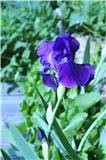
Beautiful purple Irises grew by the fences in the front in spring...
Buddha brings peace to the garden. :) See the baby lilac tree beside him? That's Lucia, a cutting from the yard of my great great great grandparents home where I spent my childhood in Maine. My great-grandmother likely planted the lilacs. According to my mom, we have a lot in common as far as our relationship with nature goes and I am so grateful to have this living piece of that sweet property in Maine from a time that will always have a piece of my heart. Right now, it is planted in a pot, which we planted in the ground to protect the roots over the winter. The lilac tree has to over-winter or it will never bloom, so we have moved it around in a bucket and someday when we have a more permanent location we will plant it into the ground. She is doing really well, though and has at least quadrupled in size since she was given to us by the sweet present owner of the house.

Here's the greens garden in the beginning...


And I have no idea why this is horizontal, or how to change it for that matter, so here is a view of the farthest garden bed now, full of basil (in the front) tomatoes: heirloom and cluster (gross word), Strawberries, cilantro, and other herbs just now starting to sprout.

This is our Kale now, almost full grown. We grew it for both juicing, and kale chips mmmmm.

Here is our Rainbow Chard now, which we grew for juicing, and Chard wraps.

And here is a tomato peeking out of the greens...
Here is our cilantro, about to go to seed....ahhh we need to make a lot of salsa!

Some Romaine Lettuce on its way, along with new growth from where we cut the baby greens...

And in the front yard, the little purple bell flowers have returned and are in full bloom... :)

And that is an update (finally) of our little gardens. Do you have a garden? What has your experience with gardening been like? What is growing in yours?
Love,
Abbey


Wednesday, July 13, 2011
Coconut-Banana Raisin Oat Bran Muffins (Vegan and Wheat-free)
I've been eating a great deal of raw-food lately and I'll have to tell you how its changed my life later, but today i felt like baking. I'm rarely eating wheat or gluten anymore because I just feel so much better not eating it, so I wanted something flour-free. I had some ingredients left over from bringing muffins to breakfast with friends last weekend and couldn't resist making an even more delightful version of an already yummy classic.
And they are Vegan and wheat-free,too.
Did you know that a Vegan diet is completely free of bad cholesterol? Many people never knew that, and although being vegan won't be everyone's chosen path, it sure can benefit everyone to eat vegan now and again. Bad cholesterol simply doesn't exist in plant-based foods. And the great thing is, most recipes can be easily converted to their vegan counterpart.
So if you feel like having a muffin that is free of cholesterol, quick to make, and simply delicious (especially warm out of the oven with a little Earth Balance or coconut butter spread on it) here's a recipe for you!
Oh and I used organic ingredients, many that can be found in the bulk section of your local natural foods store.
Coconut-Banana Raisin Bran Muffins (Makes 12)
Dry Ingredients (combine well in a large bowl)
~2 cups oat bran
~2 teaspoons baking powder (I use the aluminum free kind you can get anywhere)
~1 teaspoon sea salt
~3/4 cup organic raisins
~2 teaspoons organic cinnamon
1/2 cup organic unsweetened coconut flakes (eww don't use the sweet kind from the store, it usually has propylene glycol in it, which is kind of like anti-freeze. Gross.
Wet Ingredients (whisk together in a small bowl)
~3/4 cup almond milk (I like this better than soy, but you could use any dairy alternative milk)
~2 Tablespoons oil (such as canola)
~A tiny bit under 1/2 cup liquid sweetener such as raw agave nectar (the kind that's not boiled down) or pure maple syrup. I consider these sweeteners to be a little easier for my body to process and less addictive than cane sugar. I used agave when I made this recipe.
~1 banana, mashed up smooth :)
~Egg Replacer for 2 eggs. Now, with the banana in here, I don't know if this is necessary, as the banana should act as a binder, but I haven't tried it without yet and I have Ener-G Egg Replacer on hand so I used it, and the muffins came out fabulous. If you want to use it, you can grab a box at your natural foods store. The measurements are on the back and its just a powder that you whip up with some warm water. Easy egg-replacer for many baked recipes.
Combine wet with dry ingredients, and it should be firmer than cake batter (it shouldn't just drip off of a spoon, but shouldn't be as firm as cookie dough either) And if its too liquidy, just add a bit more coconut until desired consistency is reached. You can add more oat bran, but this can leave your muffins too dry if you over-do it.
oil muffin tin, fill cups to 3/4 way full.
Oven at 420 degrees F. My oven is extra hot, and the original recipe says 425, but you'll have to adjust according to your oven.
Bake for 15-17 delicious-smelling minutes, the sides will be golden.
Remove from oven. (duh. Unless of course you enjoy a good oven-blackened muffin.
let cool for a few, then remove muffins from tin and let cool on a rack for a few more, then spread with Earth Balance (available at your local natural foods store) and enjoy!!!!
Also enjoy not feeling as bloated or mucusy due to no processed flour, and enjoy not adding to your heart attack risk, and a multitude of other problems I won't get into right now.
Ok. Go make some muffins.
Oh and if you read this post, do drop me a comment if ya don't mind. I'm trying to figure out if anyone reads my blog. Lol.
Love,
Abbey
P.S. I haven't actually forgotten about my Spring Cleaning Challenge just to let you all know, and I've completed several tasks on my list since my last post (like painting the desk I'm sitting at now!), but summer has a dreamy good hold on me and I've been enjoying the sun more and haven't made time to blog as often. Let me know if you've kept up with your goals!! :)
And they are Vegan and wheat-free,too.
Did you know that a Vegan diet is completely free of bad cholesterol? Many people never knew that, and although being vegan won't be everyone's chosen path, it sure can benefit everyone to eat vegan now and again. Bad cholesterol simply doesn't exist in plant-based foods. And the great thing is, most recipes can be easily converted to their vegan counterpart.
So if you feel like having a muffin that is free of cholesterol, quick to make, and simply delicious (especially warm out of the oven with a little Earth Balance or coconut butter spread on it) here's a recipe for you!
Oh and I used organic ingredients, many that can be found in the bulk section of your local natural foods store.
Coconut-Banana Raisin Bran Muffins (Makes 12)
Dry Ingredients (combine well in a large bowl)
~2 cups oat bran
~2 teaspoons baking powder (I use the aluminum free kind you can get anywhere)
~1 teaspoon sea salt
~3/4 cup organic raisins
~2 teaspoons organic cinnamon
1/2 cup organic unsweetened coconut flakes (eww don't use the sweet kind from the store, it usually has propylene glycol in it, which is kind of like anti-freeze. Gross.
Wet Ingredients (whisk together in a small bowl)
~3/4 cup almond milk (I like this better than soy, but you could use any dairy alternative milk)
~2 Tablespoons oil (such as canola)
~A tiny bit under 1/2 cup liquid sweetener such as raw agave nectar (the kind that's not boiled down) or pure maple syrup. I consider these sweeteners to be a little easier for my body to process and less addictive than cane sugar. I used agave when I made this recipe.
~1 banana, mashed up smooth :)
~Egg Replacer for 2 eggs. Now, with the banana in here, I don't know if this is necessary, as the banana should act as a binder, but I haven't tried it without yet and I have Ener-G Egg Replacer on hand so I used it, and the muffins came out fabulous. If you want to use it, you can grab a box at your natural foods store. The measurements are on the back and its just a powder that you whip up with some warm water. Easy egg-replacer for many baked recipes.
Combine wet with dry ingredients, and it should be firmer than cake batter (it shouldn't just drip off of a spoon, but shouldn't be as firm as cookie dough either) And if its too liquidy, just add a bit more coconut until desired consistency is reached. You can add more oat bran, but this can leave your muffins too dry if you over-do it.
oil muffin tin, fill cups to 3/4 way full.
Oven at 420 degrees F. My oven is extra hot, and the original recipe says 425, but you'll have to adjust according to your oven.
Bake for 15-17 delicious-smelling minutes, the sides will be golden.
Remove from oven. (duh. Unless of course you enjoy a good oven-blackened muffin.
let cool for a few, then remove muffins from tin and let cool on a rack for a few more, then spread with Earth Balance (available at your local natural foods store) and enjoy!!!!
Also enjoy not feeling as bloated or mucusy due to no processed flour, and enjoy not adding to your heart attack risk, and a multitude of other problems I won't get into right now.
Ok. Go make some muffins.
Oh and if you read this post, do drop me a comment if ya don't mind. I'm trying to figure out if anyone reads my blog. Lol.
Love,
Abbey
P.S. I haven't actually forgotten about my Spring Cleaning Challenge just to let you all know, and I've completed several tasks on my list since my last post (like painting the desk I'm sitting at now!), but summer has a dreamy good hold on me and I've been enjoying the sun more and haven't made time to blog as often. Let me know if you've kept up with your goals!! :)
Subscribe to:
Posts (Atom)


 Posts
Posts

